


Blockheads 7 - Block 1

Updated: 5 days ago
Block 1 - Spring Walk by Vanessa Goertzen of Lella Boutique
How exciting! Another Blockheads has started.
I love the community of Blockheads. Everyone is supportive and I really enjoy seeing how all the blocks look different. That's one of the things that always blows my mind about patchwork. Every single quilt created is a unique piece of art. Even if you have sewn a kit, it will not be exactly the same as the original. Different pieces are cut from different parts of the fabric and used in unique ways. So I am really looking forward to seeing everyone's blocks on the Facebook group.
Since I design wovens and toweling for Moda I thought I would concentrate on ways to use wovens in these blocks. You can also use the same information for directional prints. Feel free to mix wovens in with your print fabrics too.
So the information in my Blockheads Blogs is designed to give you tips for using wovens, stripes and directional fabric and also getting you to think about how to cut these fabrics out to create some interesting geometry in your blocks.
I am not giving rules; they are just some ideas to think about.
You can cut your wovens any way you like, I am just providing some ideas that you might like to add to your tool box of skills.
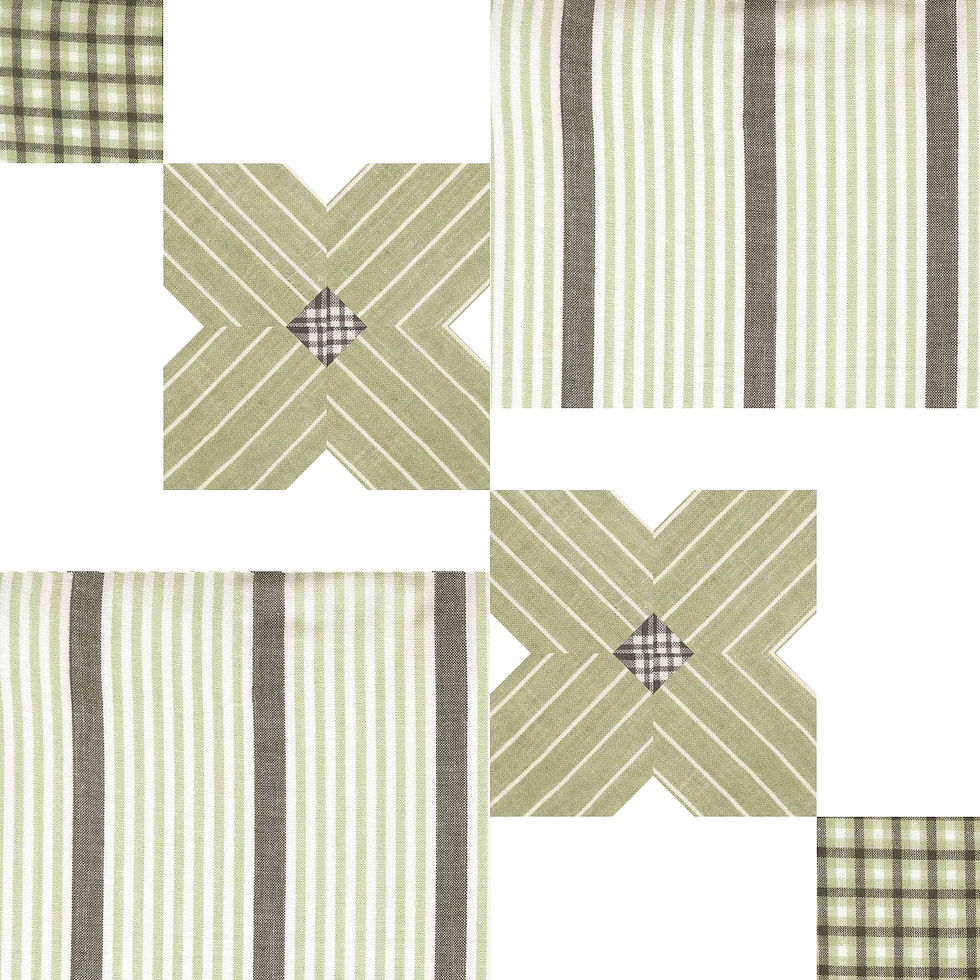
Here is Spring Walk mocked up in my new Eucalypt Wovens Line.
I have starched all the fabrics prior to cutting. The wovens are very silky soft, so they are much easier to sew with once they have been starched. I mix up powdered starch in a fairly strong concentration and immerse the fabric fully. I then wring it out and hang it on the clothesline to dry. They are then pressed with steam and are ready to cut.

Here is a second version.
You can see that I have not pieced the G3 and F strips together. I have just cut a rectangle from one of my striped fabrics instead of piecing the fabric to make stripes.
If you do this you will need to cut 2 of each for the following block sizes:
9" block cut - 5" x 4 1/4"
12" block cut - 5 1/2" x 6 1/2"
18" block cut - 9 1/2" x 8"
24" block cut - 12 1/2" x 10 1/2"
For the flower petals I have run the stripes diagonally.
Cut the square the same size as the instructions but have your ruler point to point on the stripes.
Once you have cut one square, use it as a template to cut the remaining squares the same.
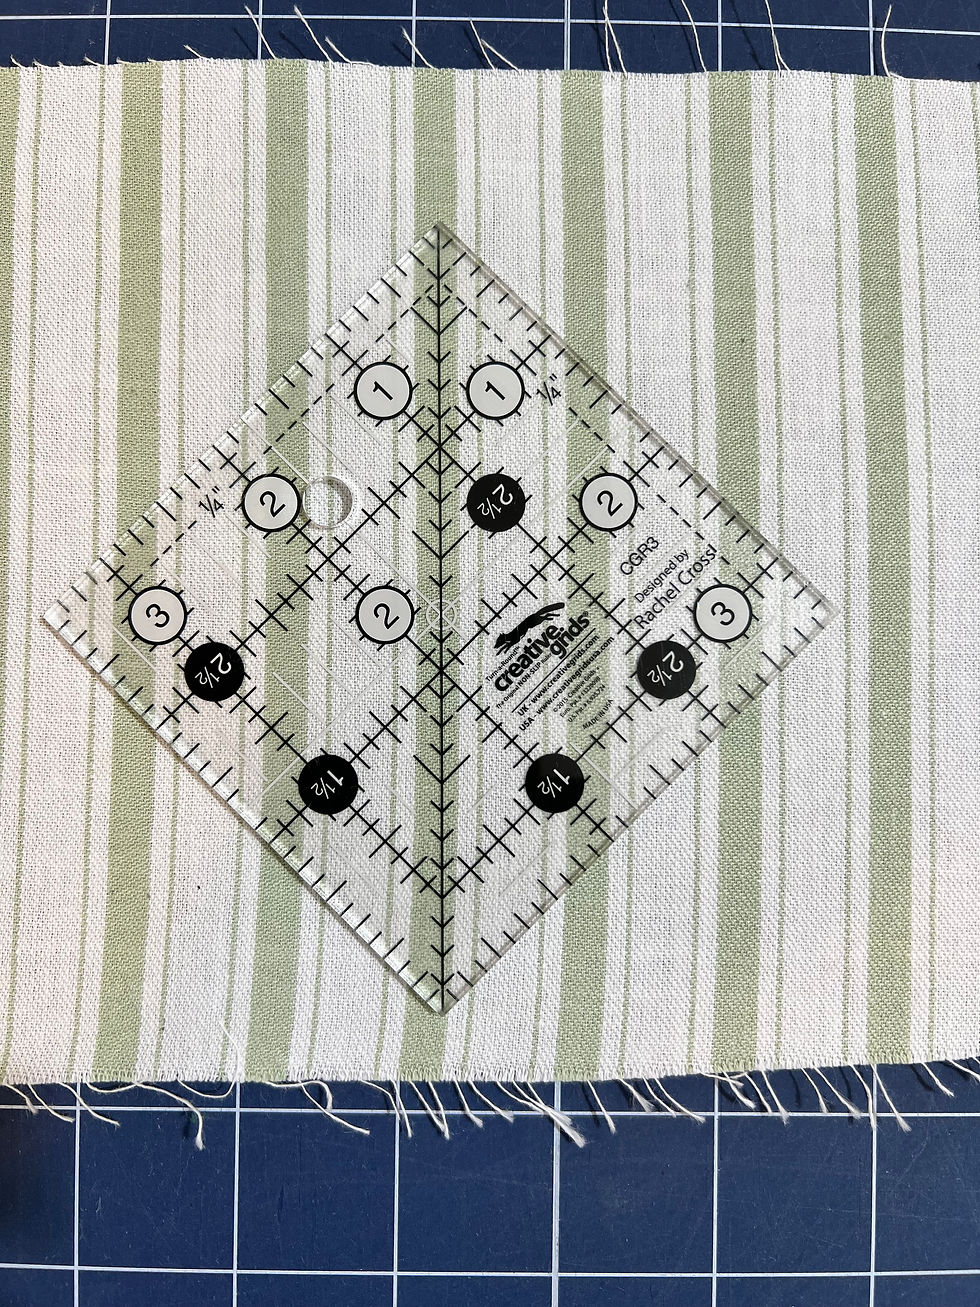

Here is an example of the template square,(on a different fabric) lined up on the fabric, ready to cut from the green and white fabric.
If your 4 squares are all cut from the same section of stripe, you will be able to match the stripes to make a pattern.
The edges of the squares are now cut on the bias, and these are stretchy. If your fabric is heavily starched, this won't be a problem.
Remember, these tips are for using stripes in an unconventional way. You can just cut the stripes straight, like I have with the green pin stripe fabric. Maybe you are using prints, so this doesn't apply, but it is good to have some ideas and skills that give you options to try something different.
These tips will work with a directional print too.
I am looking forward to seeing your blocks on Facebook on the Moda Blockheads group.
As usual,
Happy Sewing
Jenelle
Comments