Blockheads 5 - Table Runner Layout
- Nov 9, 2023
- 5 min read
If you have completed nine 6 ½" blocks then this table runner is a project suggestion for you. I thought a table runner would be great if you are sewing with Christmas fabrics and I also think it is a wonderful way to use Moda Toweling.
If you haven't sewn with Moda Toweling before, don't panic. It is very easy to sew with, I recommend using a walking foot, only because the fabric is a little heavier weight than regular patchwork cottons.
You can download the instructions for free from the Free Projects section on my website, or click here for the link.
In this blog I will give you lots of hints and tips for sewing this runner.

This is the completed runner. Using nine - 6 ½" blockheads blocks. You can choose the location of your blocks however you like, this arrangement worked for me.
The first step is to choose your toweling. Here are some photos of me auditioning the blocks with different 18" wide towelings. These are all from my new Panache line, which will be in stores in April.
There are plenty of 18" wide towelings to choose from in stores now, including reds from my Enamoured line and greens from Vista.
If you can't find the one you want in your favourite store, please browse my website.
I decided to choose the dark red toweling in the bottom left corner of the photos. The blocks didn't pop enough on the white toweling and even though I loved them on the black, I decided to choose the deeper red, since it was a Christmas project.

Choose a toweling that coordinates with your fabrics that are in your blocks. If you are not sewing a Christmas Runner you can leave the fringing out.
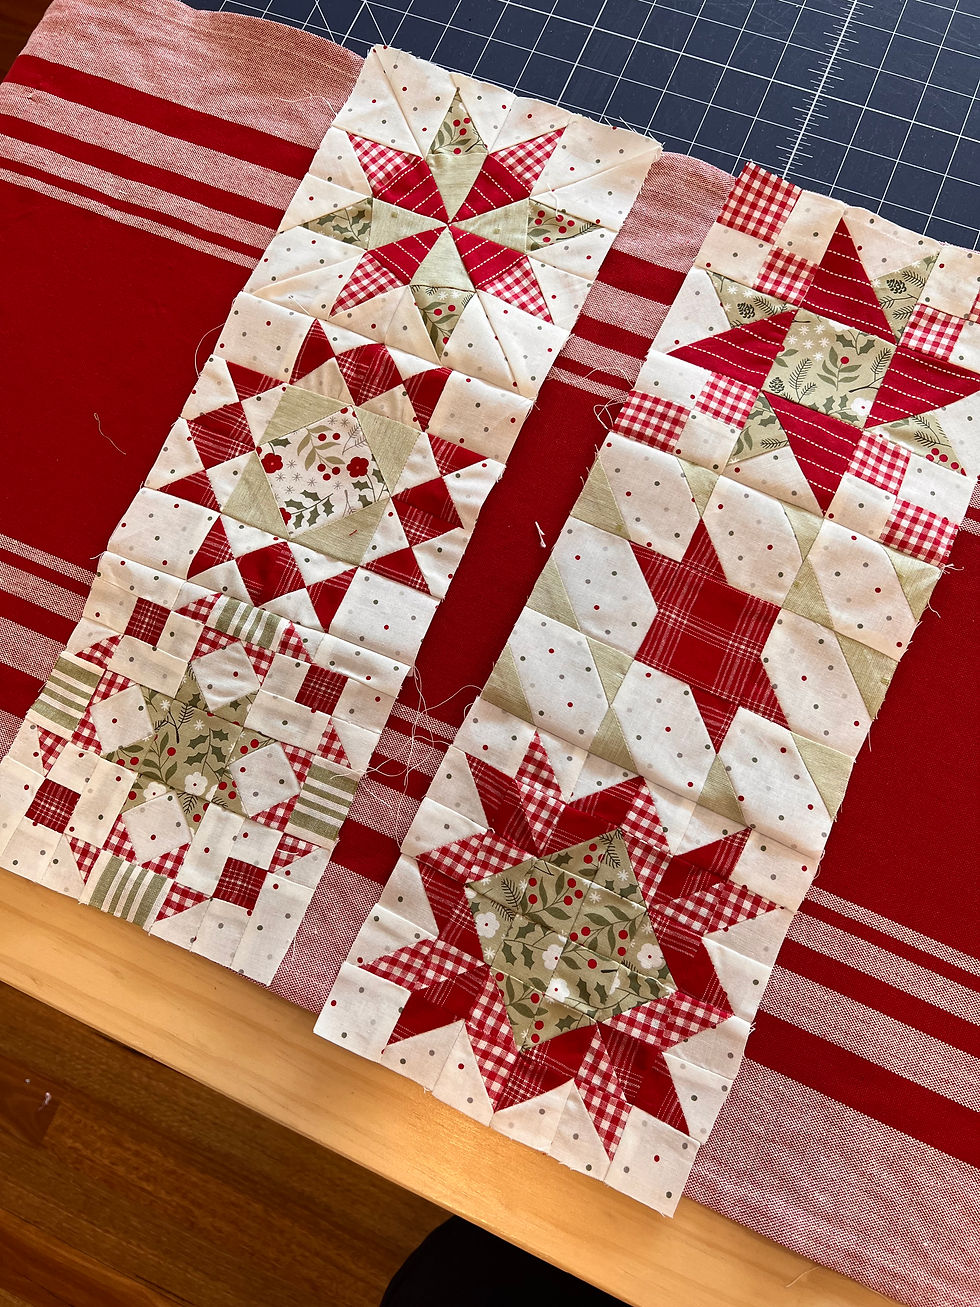
Once your toweling is chosen you need to sew together 2 sets of 3 blocks. So play with the layout on your toweling to see which block goes where. You need 3 blocks for the centre of the runner too.
Here are the 2 sets of 3 blocks, stitched together with ¼" seam.
You will notice they are a tiny bit wider than the hemmed toweling. You will need to unpick the hems on the toweling for this project. It doesn't take long.

Once you have unpicked the hems, press the toweling well. Notice how I drape the toweling over the ironing board. This helps to stop you stretching the edges as you press.
If you run the fabric lengthwise, you run the risk of stretching the fabric while you press.
Doing it this way you can gently press the edges out and then move the fabric up.

I decided to add a little fringed fabric to the long edges of the blocks. This was not in my original plan, but since it was a Christmas project I thought it would look sweet. You can leave this step out if you don't like it.
View my video on Fringing Fabric here, to see how to do this. Trim the fabric down so there is ½" fringing and ½" of woven along the length of the strip.
You need 18 ½" strips (x4)
Once you have the fringed fabric place it on the right side of the two sets of 3 blocks, matching both long raw edges. One strip for each long edge, the woven edge lines up with the raw edge of the blocks Sew in place with ¼" seam.

Place the plain lining on the right side of each set of blocks and sew down both long edges with ¼" seam.

Turn the right way out through the open ends.
Then press well.

You will have 2 strips that look like this.
If your fringing is not even, now is the time to trim it to be ½" wide.

Place the 6 ½" lining squares on the right side of the 3 centre patchwork squares and sew around the edge with ¼" seam. Leave a 3" opening for turning through.
Turn the blocks right side out and press well so the seams are on the edges.
All the pieces will now look like this.
You could just turn the raw edges of the 3 centre blocks under ¼" and press, but I find using a lining gives a better finish, and prevents the dark red of the toweling showing through the white fabric on my blocks.

Find the centre of your length of toweling by folding it in half and marking with a pin.
Place centre block in the middle and a block either side, using a ruler to ensure they are in a straight line.
I use a little Roxannes Glue Baste-It on the corner of each block to hold them in place.
I then hand stitched them to the toweling. You could also machine stitch the edges, if you prefer.
I use fine bottom line thread for all my hand applique work. It is strong and almost invisible. Choose a colour that matches your applique fabric. Watch this video to see my favourite appliqué tools. For more applique tips, you can view my applique video here.

To place the sets of 3 blocks at each end, measure 11" from the point of the closest centre block, towards the end. Place the edge of the fringing at this point. Repeat for the other end of the runner. Centre the blocks between the two long sides, the toweling will be a little wider than the blocks.

Make sure the blocks are straight across the toweling by using a ruler to line up on the toweling stripes. The long edge of the ruler will be perpendicular to the stripes, so your strip of blocks will be straight.
Sew both sets of the pieced blocks in place ⅛" from the long edges of the blocks.

Once the blocks are stitched in place it is time to trim the excess width off the toweling.
My toweling, with the hems unpicked, is ½" wider on each side than the blocks.
Use a ruler trim off the excess width.

Repeat for both sides of the runner, making sure the edges are straight.

Line up the 5" mark on your ruler, with the edge of the pieced blocks and trim both ends of the runner.
Now your runner is ready to back.
Cut a piece of fabric the same size as the toweling.

Fuse lightweight interfacing onto the wrong side of the backing fabric.
I place the interfacing, glue side up, with the backing fabric on top. I move the iron in circular motions until the interfacing is fused.
The slide the backing over the ironing board and keep working until all the interfacing is fused.
I find that placing it this way on the ironing board helps prevent wrinkles forming. The weight of the fabric, keeps it hanging straight and I get a better result than when I place it on the ironing board lengthwise.

Place the backing and runner right sides together and sew around the edges with a ¼" seam.
Leave a 12" opening for turning through.
Turn the runner the right way out and press the edges well. I use clips to hold the open edged section together.
Sew around the edge of the runner ⅛" from the edges.
To hold the layers together I have stitched along the edges of the woven stripes on the toweling. Stop and start at the patchwork blocks, don't sew over them.
Your Blockheads Table Runner is completed.
Well done.
Happy sewing
Jenelle


Comments